How to Conduct a Shoulder Exam
Shoulder pain is one of the most common complaints in the outpatient setting. The etiology is most of the time traumatic and related either to sport or accidents. Other causes are degenerative joint disease and arthritis. In each case it is important to be familiar with some basic examination tools that can help us confirm the presence of a shoulder lesion.
Introduction
Shoulder Exam
In examining a patient with a painful shoulder we should start with a general inspection, looking for musculoskeletal abnormalities and any associated functional deficits. Then, we can carry on some specialized tests that will help us uncover any lesions of the muscular or ligamentous structures of the joint.
Inspection
Shoulder Exam
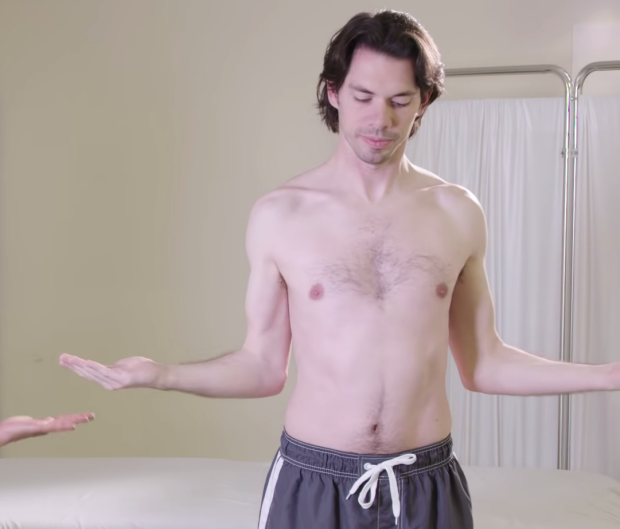
The physical exam of the shoulder starts by observing the patient removing his or her shirt. This is our first opportunity to notice any functional impairments of the shoulder joint.
General Inspection
Once the patient has uncovered the upper trunk and extremities we can move to a general inspection of the front, the side and the back of each shoulder. Our goal is to identify any abnormalities in the muscle bulk or any asymmetrical bony defects.
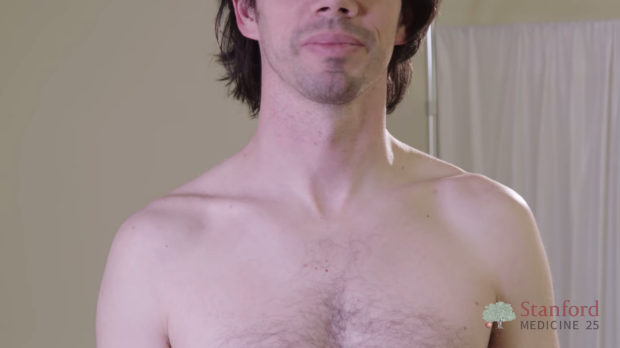
Inspect the front, the back and the side of the shoulder.
Cervical Spine Exam
Before proceeding with the examination of the shoulder it is very important to complete a full examination of the cervical spine to make sure that no spinal pathologies are contributing to the presentation. We should at the very least check for cervical spinal tenderness, by palpating the cervical spinous processes, and the range of motion of the neck in flexion, extension and rotation.
Range of Motion
We should then test the range of motion (ROM) of the shoulder in different directions. If movement in a specific direction is painful or limited, this may signify that pathology is present in a specific structure of the shoulder. For all these maneuvers, have the patient standing in front of you.
Forward Flexion
Starting with the patient having the forearm fully extended at the elbow with the arm attached to the side of the trunk, ask the patient to flex the arm at the shoulder by moving the upper extremity anteriorly and then superiorly, until it is above the head.
Forward flexion.
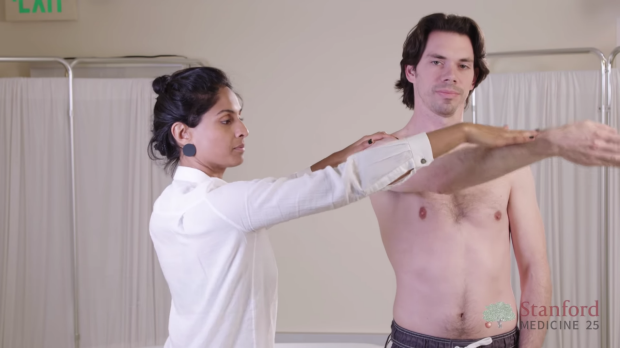
Abduction
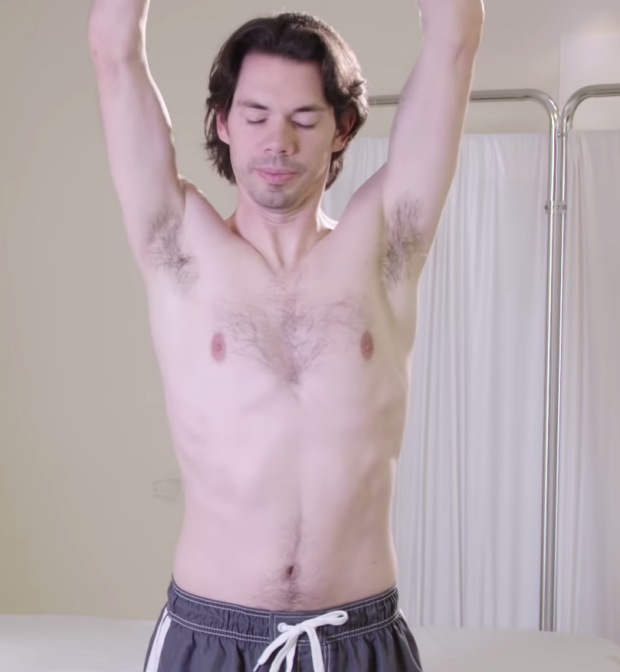
Ask the patient to abduct both arms by elevating them laterally until they are above the head, at 180°.
Abduction. Image credit.
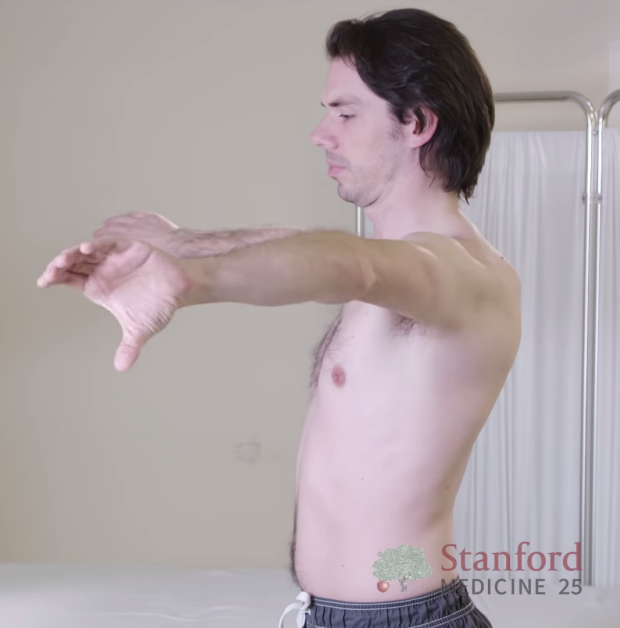
Cross-body Adduction
Have the patient flexing the upper extremity forward to 90°. From this position, ask the patient to maximally adduct the shoulder by moving the arm horizontally all the way to the other side. Make sure to test one side at a time.
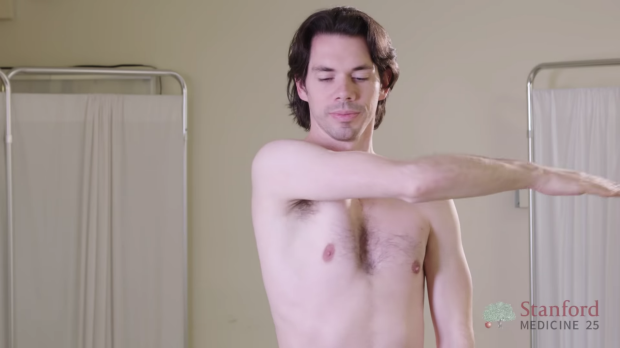
Cross-body adduction.

External Rotation
Ask the patient to flex the elbow at 90° with the arm attached to the trunk and the palms supinated. Then have the patient externally rotate the shoulder by bringing the forearms laterally.
External rotation.
Extension
Starting with the patient having the forearm fully extended at the elbow and the palms supinated, ask the patient to extend both arms at the shoulder by moving the upper extremities posteriorly.

Extension.
Internal Rotation
First ask the patient to flex the elbows at approximately 45° with the fists clenched and the thumbs up, then ask to position both hands behind the back until the thumb touches the apex of the homolateral shoulder. This maneuver tests for the functional integrity of the internal rotation of the shoulder.
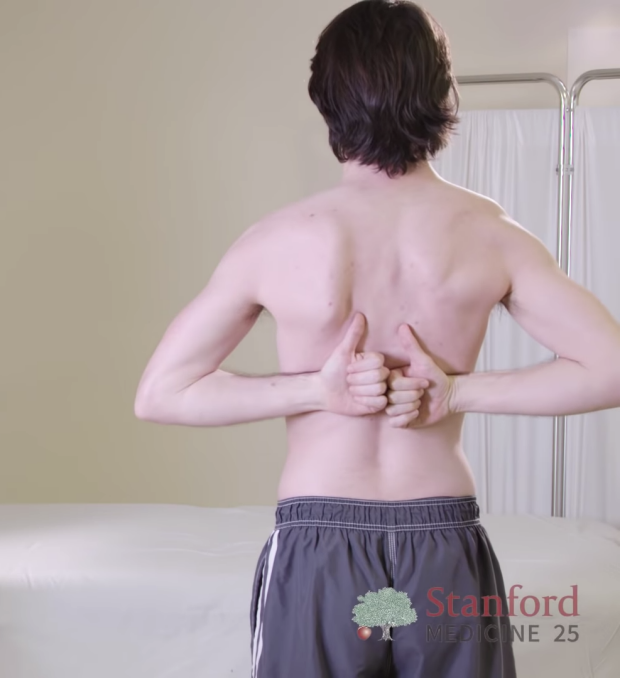
Internal rotation.
Scapular Motion
Before completing the inspection of the shoulder it is good practice to repeat all the maneuvers that test for range of motion while observing the movement of the scapulae. Any asymmetries in the rhytm of scapular movement would indicate pathology in the anterior aspect of the shoulder.
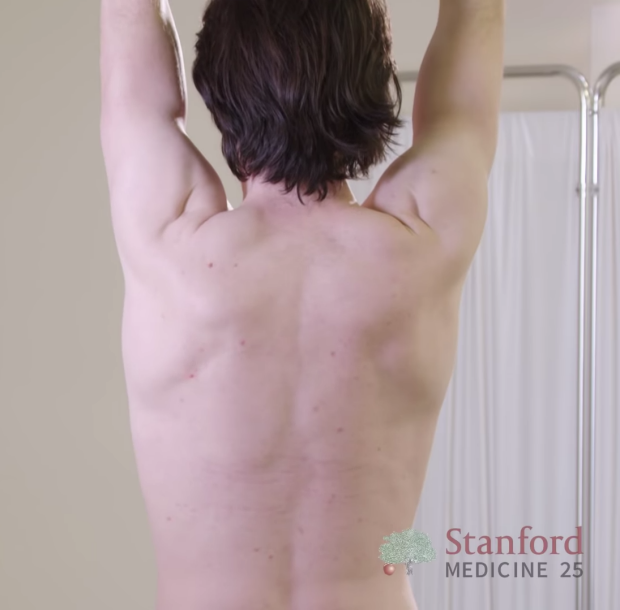
Observe for scapular motion asymmetries.
Specialized Tests
Shoulder Exam
The exam of the shoulder has to be completed by some specialized tests and provocative maneuvers that are specific for different shoulder lesions and pathologies. These tests will help us confirm or exclude the presence of a specific shoulder condition, that we may only suspect after the inspection and the assessment of the full range of motion.
Rotator Cuff Examination
Shoulder Exam
Rotator cuff injuries are among the most common causes of shoulder pain. These can manifest as bursitis, tendonitis or tendon tears. The patients usually complain of pain and reduced function of the affected shoulder. In young patients a rotator cuff tear is usually traumatic in etiology and the symptoms show an acute onset. In older patients, instead, a tendon tear is usually caused by a chronic degenerative process related to aging, and the pain is more gradual in onset.
When rotator cuff pathology is suspected, we can use some maneuvers to test the integrity of the four tendons that make up the cuff:
- Infraspinatus
- Supraspinatus
- Subscapularis
- Teres minor
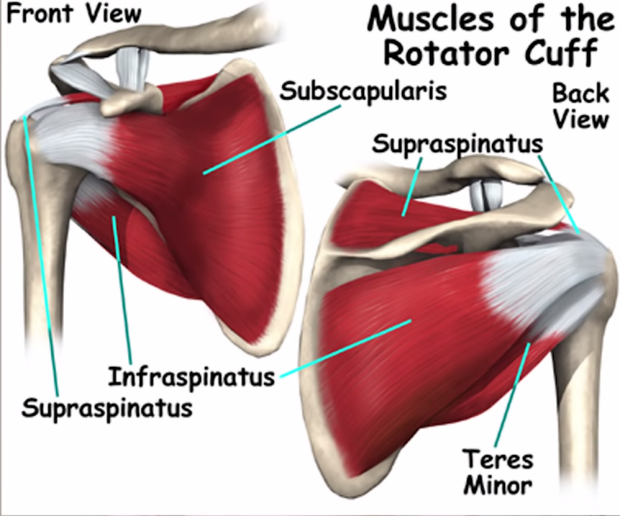
Rotator cuff anatomy.
Supraspinatus Test
The supraspinatus tendon is the most frequently injured tendon of the rotator cuff. To test for integrity of the supraspinatus we can ask the patient to abduct both arms to 90° and then to bring them anteriorly with a 30° forward flexion. From this position, we will ask the patient to push both arms upwards against our resistance. Any pain or reduced strength, especially if unilateral, will be indicative of a supraspinatus tendon injury.
Also, starting from this position we can ask the patient to bring both thumbs down, performing the so called empty can test. Again, we will be pushing downwards against the patient’s resistance, to check for pain and weakness.

90° abduction and 30° forward flexion.
Empty can test.
Infraspinatus and Teres Minor
To check for the integrity of both infraspinatus and teres minor tendons we need to apply resistance to the external rotation of the shoulder. To do this, we will ask the patient to flex the forearms at 90° with the palms supinated. From this position we will have the patient to externally rotate the shoulders by moving the forearms laterally, against our resistance. Any pain and/or weakness will indicate an injury in one of these tendons.
External rotation against resistance.
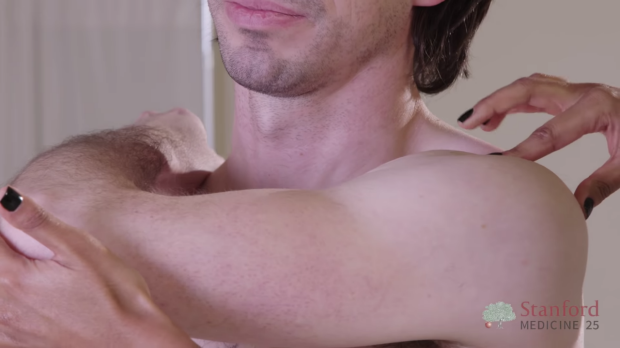
Subscapularis
To test for the presence of a subscapularis tendon tear, first have the patient to bring the hand on the back at the level of the lumbar region. Then, passively separate the hand from the back until full internal rotation of the shoulder is achieved. At this point ask the patient to actively keep the hand away from the back. If the patient is unable to do so, this is evidence of a subscapularis tendon tear and it is called positive internal rotation lag sign.
Negative lag sign.

Positive lag sign.
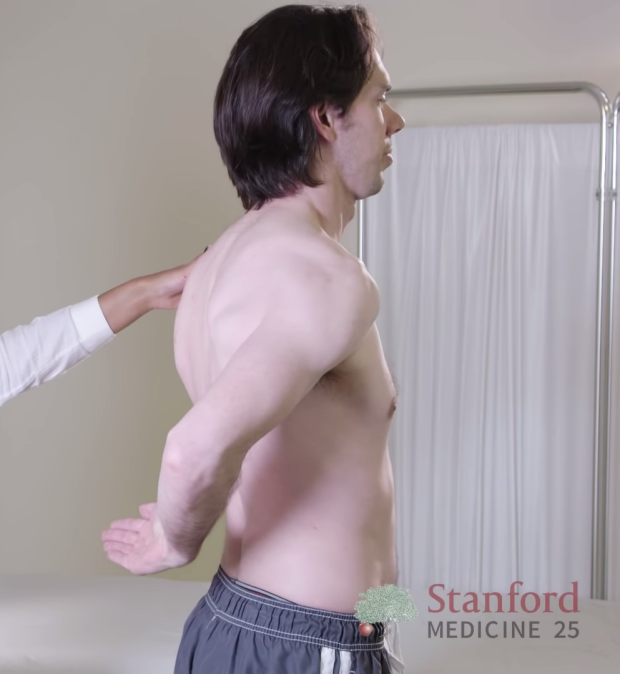
Gerber’s Lift Off Test
Ask the patient to internally rotate the shoulder by bringing the hand behind the back at the lumbar region with the dorsum of the hand facing the lumbar spine. Then, ask the patient to move the hand away from the back against your resistance. If pain or weakness is elicited, the test is considered positive for a subscapularis tendon tear.

Gerber's Lift Off Test.
Serratus Anterior
Even though it is not considered part of the rotator cuff, we can test the strength of this muscle after the exam of the rotator cuff, given its role in stabilizing the scapula and hence the shoulder joint.
To assess for a functional deficit of the serratus anterior we can ask the
patient to do a standing push-up against the wall. If we observe a winging of a
scapula this indicates weakness of this muscle on that side.
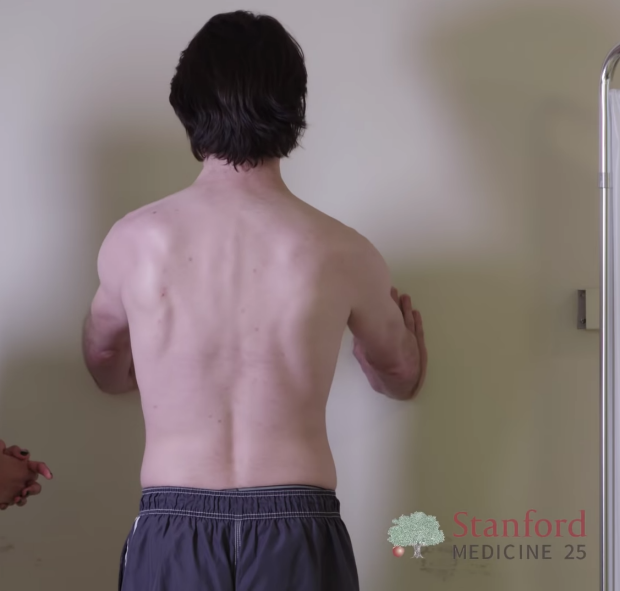
Standing push-up.
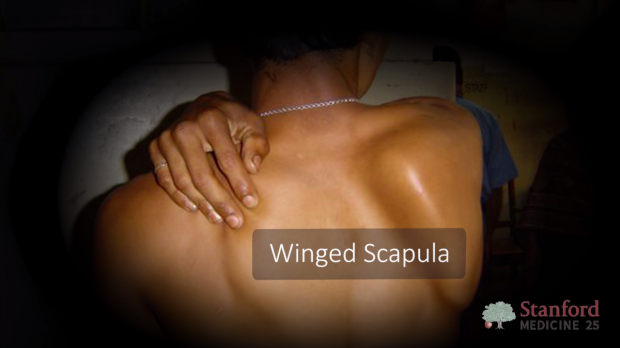
Winging scapula.
Shoulder Impingement
Shoulder Exam
In the shoulder impingement syndrome, the tendon of the supraspinatus is inflamed as a consequence of repetitive trauma to its subacromial portion. Any processes that reduce the subacromial space together with repetitive overhead motion of the shoulder may contribute to the development of this condition. It usually manifests as shoulder pain, particularly at night, and weakness in the overhead extension of the arms.
We can use three tests to check for the presence of shoulder impingement:
- Neer’s Test
- Empty Can Test
- Hawkins-Kennedy Test
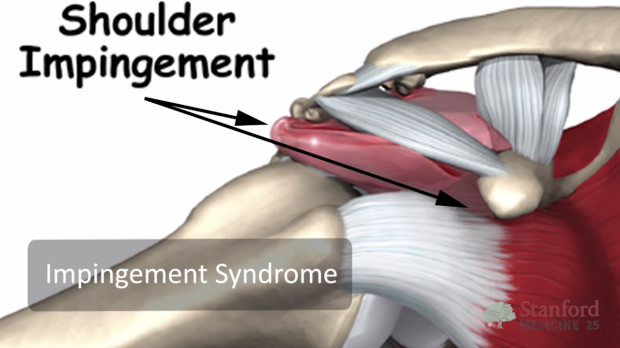
Shoulder impingement.
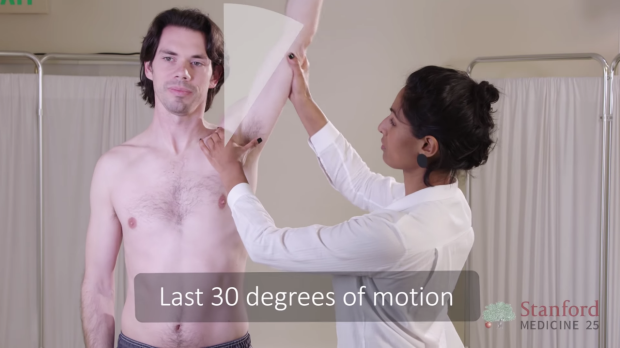
Neer's Test
In Neer’s test, first we ask the patient to fully pronate the forearm, then we passively flex the arm until it is over the patient’s head. This maneuver reduces the subacromial space and reproduces pain if shoulder impingement is present.
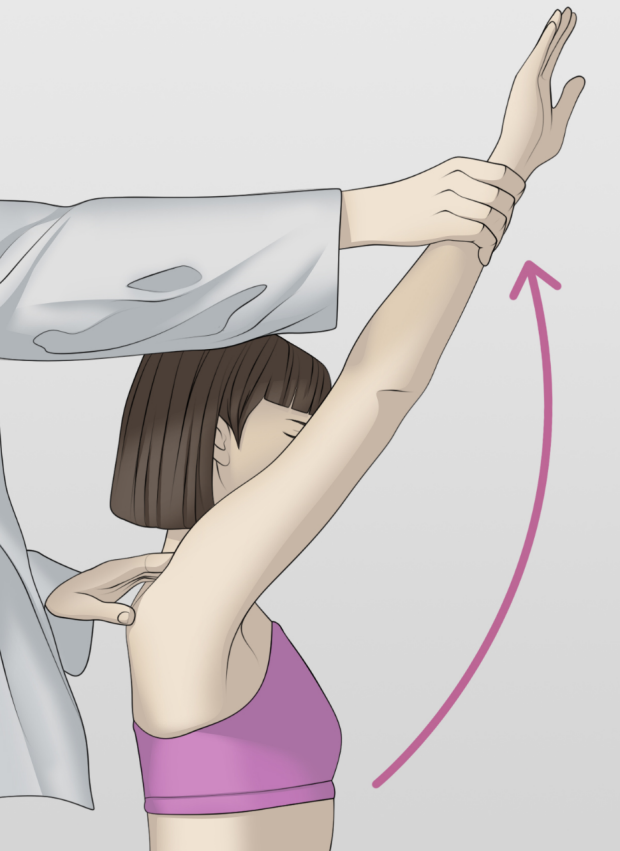
Neer's Test. Image credit.
Empty Can Test
This is the same test that is used to check for the supraspinatus tendon integrity. It reduces the subacromial space thus eliciting pain if impingement is present.
Hawkins-Kennedy Test
To perform this test both the elbow and the shoulder should be flexed at 90°. The examiner must support the arm of the patient at the level of the elbow so that the upper extremity can be as much relaxed as possible. Then the examiner has to internally rotate the shoulder while at the same time perform a cross-body adduction of the arm. The test is positive if pain is elicited.
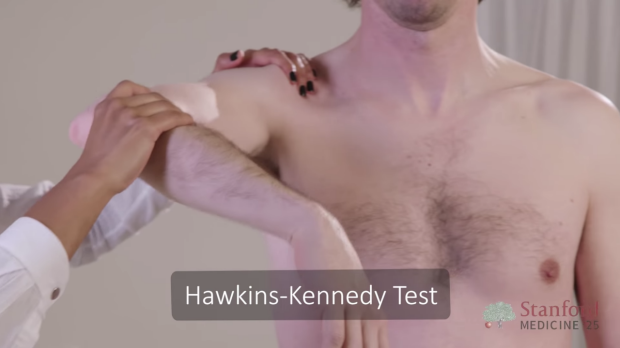
Internal rotation and cross-body adduction.
Associated Findings
Patients with shoulder impingement may also have tenderness upon palpation of the anterior joint line. To expose the subacromial and subdeltoid spaces ask the patient to internally rotate the shoulder by placing the hand against the back.
Also, scapular movement asymmetries are frequently associated with shoulder impingement.
Palpation of the anterior joint line.
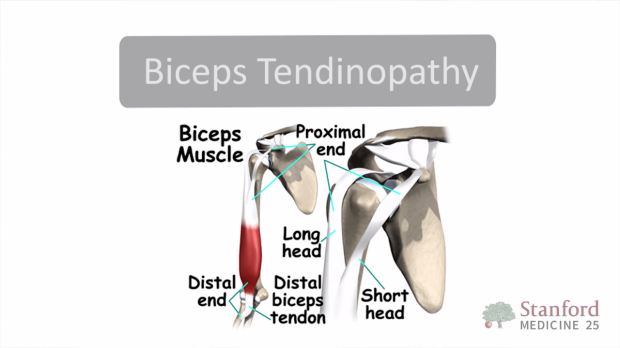
Biceps Tendinopathy
Shoulder Exam
Biceps tendinopathy refers to inflammation or degeneration of the long head of the biceps tendon. It is an important cause of anterior shoulder pain and it is usually seen in association with other shoulder pathologies, such as rotator cuff tears and shoulder impingement.
There are two specialized tests to confirm the presence of biceps tendinopathy:
- Speed’s test
- Yergason’s test
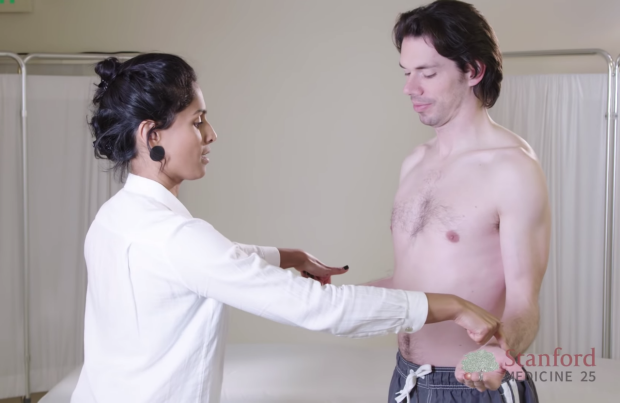
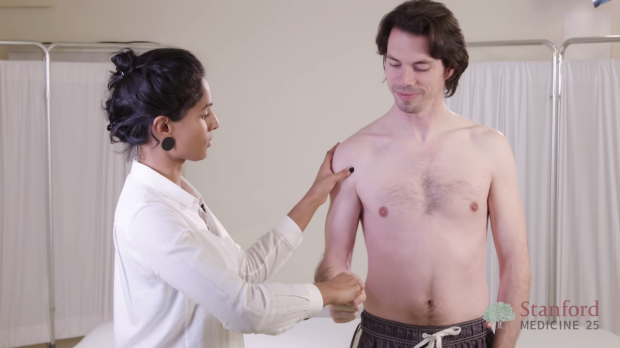
Speed's Test
In this test the patient is asked to first extend the elbow and fully supinate the forearm. Then the patient is asked to flex the shoulder forward against the resistance of the examiner. At the same time, the examiner should palpate the anterior joint line for any tenderness. Any pain elicited by the maneuver would be indicative of biceps tendinopathy.
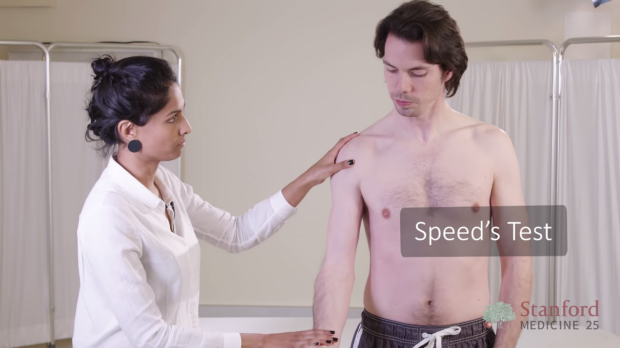
Resisted forward flexion: Speed’s test.
Yergason’s Test
The patient is asked to first flex the elbow at 90° and to partially pronate the forearm. Then the patient is asked to supinate the forearm against the resistance of the examiner that can be applied by holding the patient’s hand. At the same time the examiner should palpate the origin of the biceps tendon for any tenderness or popping sensation. The test is positive if pain is elicited.
Resisted supination: Yergason’s test
Adhesive Capsulitis
Shoulder Exam
In adhesive capsulitis the capsule of the shoulder joint becomes inflamed and stiff making every movement very painful and difficult to execute. The initial stage of the disease is carachterized by pain with movement of the shoulder in any directions. In the later stages the pain tends to subside but the ranges of motion are still severely reduced. It is important to remember that both the passive and the active ranges of movement are affected. The first range of motion to be affected is the external rotation. Also, there is usually an associated asymmetry in scapular movement.
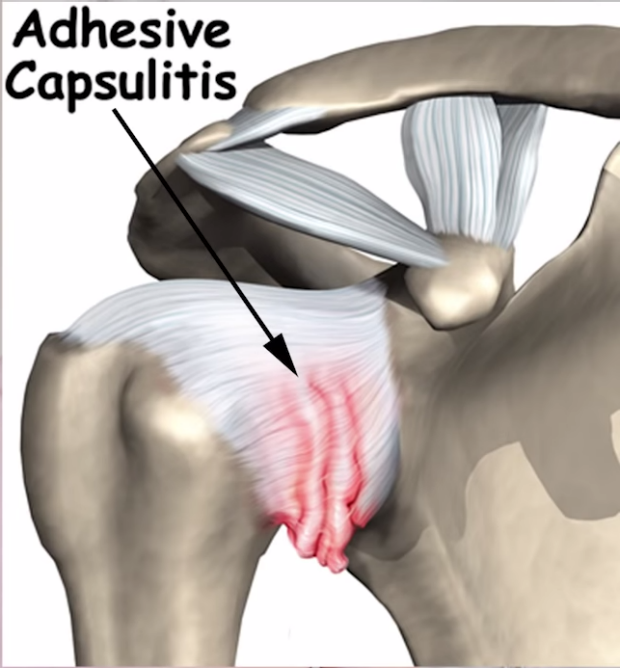
Adhesive capsulitis.
Lastly, these patients may show tenderness and spasms of the trapezius muscle. It is thus helpful to palpate the upper portion of the trapezious to elicit pain and evauate the muscle tone.
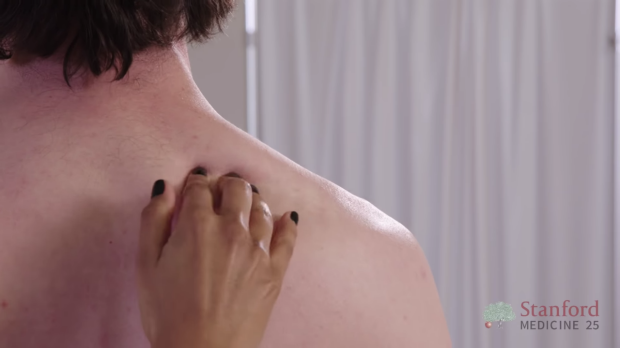
Tenderness/spasms of the trapezius.
Acromioclavicular Joint Disease
Shoulder Exam
With this term are indicated all the pathologies that may affect the acromioclavicular joint such as, degenerative processes or traumatic injuries. Regardless of the cause, the complaints are almost always the same. The patients will report pain localized over the acromionclavicular joint and pain at night triggered by sleeping on the affected side.
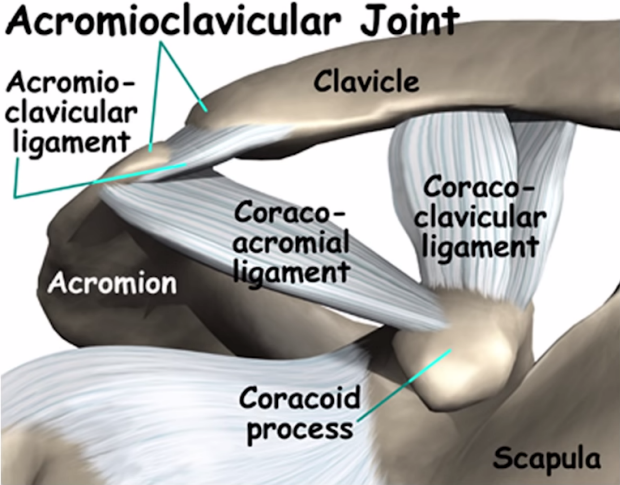
Acromioclavicular joint anatomy.
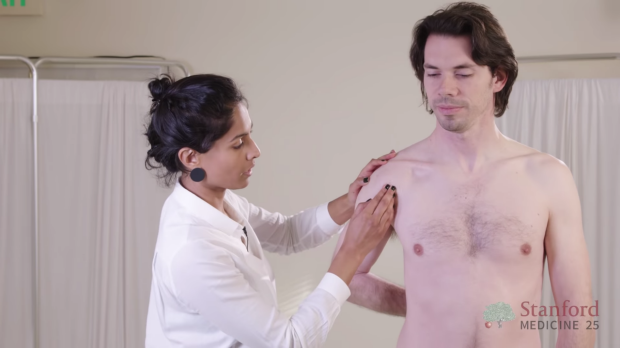
Palpation of the AC Joint
When AC joint pathology is suspected we should palpate above the joint to feel for any crepitus or step-off sensation, that may indicate AC separation. Also, tenderness of the joint is usually present in every AC joint disorder.
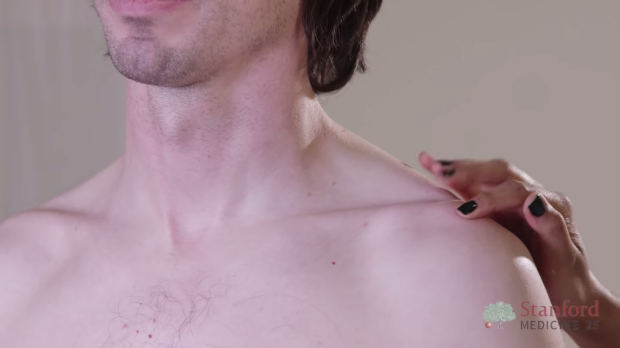
AC joint palpation.
Scarf Test
In the scarf test the examiner places the hand of the affected side on the contralateral shoulder. Then it forces the cross body adduction of the arm by pushing at the elbow. At the same time the examiner must palpate the AC joint. Any pain or crepitus are indicative of an AC joint injury.
Forced cross body adduction.
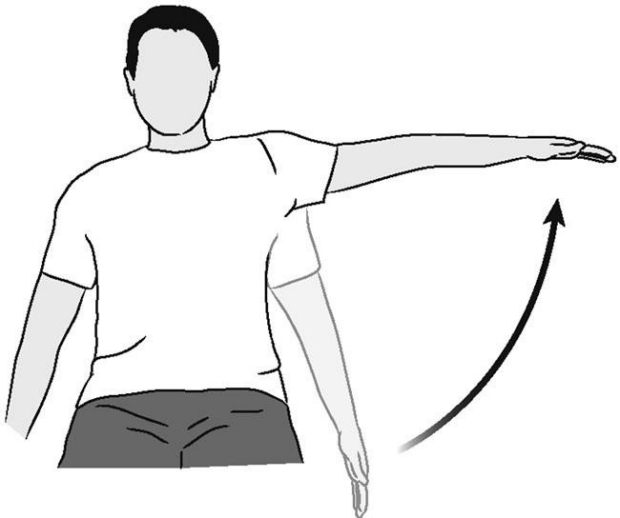
Painful Arc Test
The patient is instructed to abduct the interested shoulder to 180°. If the patient complains of pain when the arm is between 180° and 150°, the test is considered positive for AC joint injury.
Painful arc between 150°-180°.
Shoulder Instability Test
Shoulder Exam
Patients with shoulder instability complain of shoulder pain associated with a sensation of the shoulder “giving way,” actually representing the head of the humerus partially or completely leaving the glenoid fossa. This condition can be related to a congenital hyperlaxity of the capsula and ligaments of the joint, or it may be acquired after a traumatic injury to these structures.
Sulcus Sign
In this test the examiner applies a downward pressure on the humerus by pulling at the level of the wrist, and at the same time observes the lateral aspect of the deltoid region. If a sulcus appears in this region, the test is considered to be positive for shoulder instability.
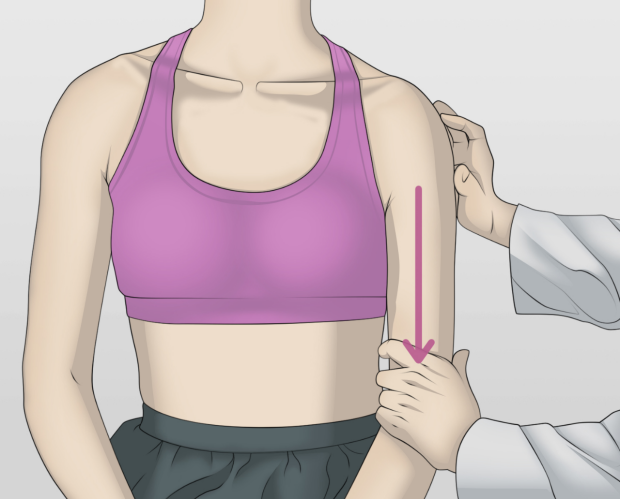
Sulcus sign. Image credit
Apprehension and Relocation Test
For this test it's preferable that the patient lies supine on the examination table. Then the examiner flexes the elbow at 90° and abducts the shoulder to 90° as well. At this point the examiner applies a downward pressure with one hand at the level of the wrist, while the other fist is placed behind the shoulder. This maneuver creates a dislocation of the humerus that should cause pain or discomfort if instability is present. Then, we must apply a downward pressure on the anterior aspect of the shoulder that makes both the pain and the apprehension disappear if instability is present.
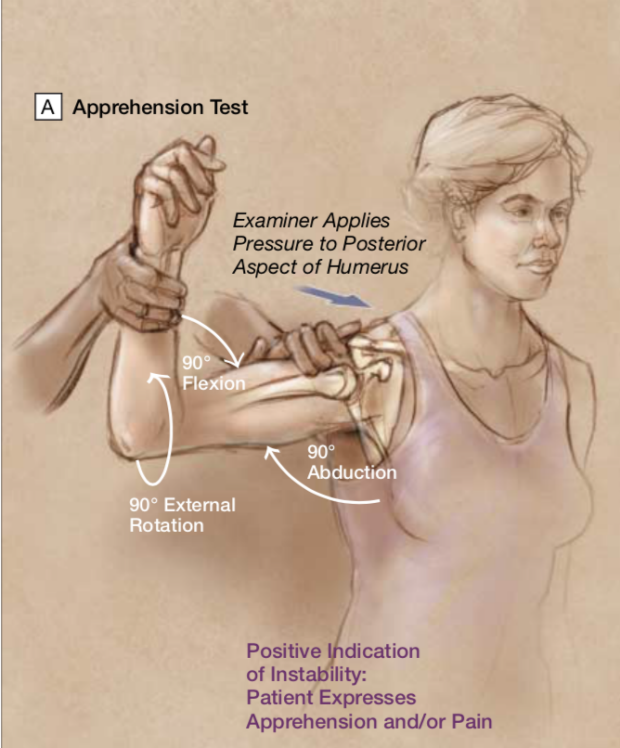
Apprehension Test. Image credit.
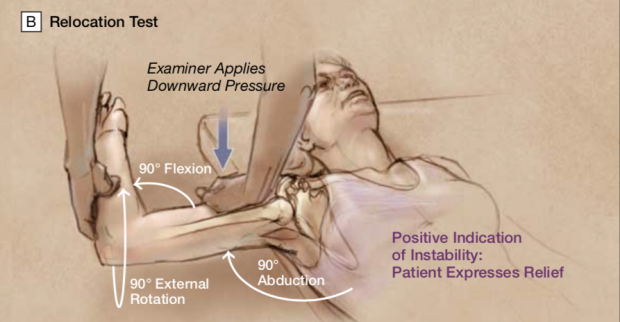
Relocation test. Image credit.
Labral Tears (SLAP lesions)
Shoulder Exam
The glenoid labrum is a ring of cartilage that surrounds the margins of the glenoid fossa. It stabilizes the shoulder joint by giving attachment to the ligaments. It is most commonly damaged in its superior portion, that also includes part of the biceps tendon (SLAP lesions). This lesion is usually seen in athletes that do repetitive overhead activities, such as baseball players, or in accidents where the arm is in the overhead position, as a consequence of humeral head dislocation.
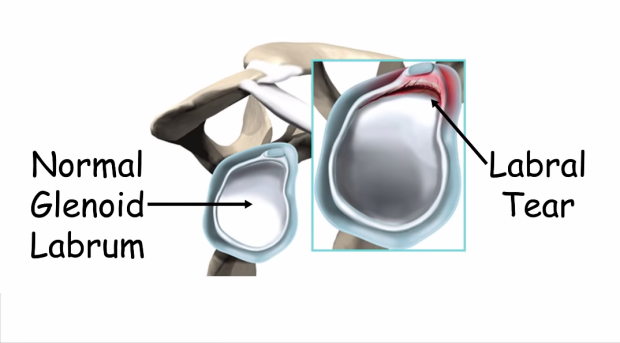
Anatomy of the glenoid fossa.
There are three tests that are used to check for the presence of a labral tear:
- O’Brian’s Test
- Crank’s Test
- Speed’s Test: the same used for biceps tendinopahty, due to the insertion of the biceps tendon on the superior aspect of the glenoid labrum.
O’Brian’s Test
In the O’Brian’s test the patient is instructed to first flex the shoulder at 90° and then to adduct it of 10°. From this position, we ask the patient to bring the arms upwards against our resistance. The presence of pain suggests a lesion of the labrum.
O’Brian’s Test.
Crank’s Test
The examiner passively flexes the elbow at 90° and abducts the shoulder at approximately 90°. Then, with one hand on the shoulder and the other on the elbow, the examiner alternates passive internal and external rotation of the patient’s shoulder by acting on the elbow. The test is considered positive if it elicits any pain or metallic sounds in the shoulder.

Crank’s Test.
Consult the Expert

Dr. Mark Genovese
Dr. Mark Genovese is a Professor of Medicine and certified in rheumatology. He is actively involved in house staff training at Stanford University. He is involved in research including clinical trials and interventions in rheumatic diseases such as rheumatoid arthritis, psoriatic arthritis, & osteoarthritis.
Clinical Pearl
If a careful exam does not elicit significant pain or laxity, imaging studies are extremely unlikely to provide further useful information.
Key Learning Points
Learn the shoulder exam aspects that include:
- inspection
- rotator cuff pathology
- range of motion tests
- biceps tendinopathy
Related to Shoulder Exam
The Stanford Medicine 25
- Aortic Regurgitation Exam
- Ankle Brachial Index
- Ankle and Foot Exam
- Ascites & Venous Patterns
- Bedside Ultrasound
- Breast Exam
- Cardiac Second Sounds
- Carpal Tunnel Exam
- Cerebellar Exam
- Deep Tendon Reflexes
- Dermatology Exam: Acne vs. Rosacea
- Dermatology Exam: Learning the Language
- Dermatology Exam: Nevi (Mole) Exam
- Fundoscopic Exam (Ophthalmoscopy)
- Gait Abnormalities
- Hand Exam
- Hip Region Exam
- Internal Capsule Stroke
- Involuntary Movements and Tremor Diagnosis: Types, Causes, and Examples
- Knee Exam
- Liver Exam
- Low Back Exam
- Lymph Node Exam
- Neck Vein Exam
- Pelvic Exam
- Precordial Movements in the Cardiac Exam
- Pulmonary Exam: Percussion & Inspection
- Pupillary Responses
- Pulsus Paradoxus and Blood Pressure Measurement Techniques
- Rectal Exam
- Spleen Exam
- Tarsal Tunnel Exam
- Thyroid Exam
- Tongue Exam
- Liver Disease, Head to Foot
- Visit the 25
- Shoulder Exam Tutorial
- Parkinson's Disease Exam
- Diastolic Murmurs Exam
- Dermatology Exam: Nevi (Mole) Exam